I got this email tonight, and did my best to help. If any of you out there in Internet world know the answer to the pink and yellowish dots please let me know and I will forward the info to Brojan.
------------------------------------------------------------------------------------------------------------------------------------------------------
Hello!
First of all, I would like to say that I really enjoy seeing your photographs. I appreciate you like a master of photography.
------------------------------------------------------------------------------------------------------------------------------------------------------
My Reply
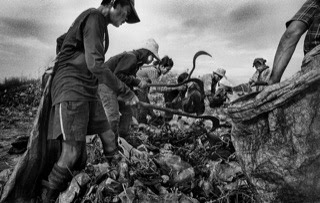
Hi Bojan, thanks for the kind words, I am far from a master of photography, just a security guard who takes photos and tries to tell important stories. I do love photography with all my heart thou :). If there is anything I can do to help you, I will. Analog photography is a truly great thing, we all need to help each other.
------------------------------------------------------------------------------------------------------------------------------------------------------
Hello!
First of all, I would like to say that I really enjoy seeing your photographs. I appreciate you like a master of photography.
I
need some advice about bleaching. I tried to selective bleaching with a
solution of 0,5 gram of Potassium Ferricyanide + 100ml of water
on fomabrom 111 paper (Ilford multigrade developer, stop bath
(water+acetic acid), Efke standard fixer). Results are a mix of
pink/yellow color of spots/places on paper where I used solution. When I put a
paper in the fixer, the yellow color is little disappeared, spots turn in
whiter than was before fixed. The pink color is still there. I used several
p.ferricyanide from different stores. The last one was totally clean (for
laboratories testing). Where I made mistake?
Thanks
a lot, Bojan ---------- from Croatia
------------------------------------------------------------------------------------------------------------------------------------------------------
My Reply
Hi Bojan, thanks for the kind words, I am far from a master of photography, just a security guard who takes photos and tries to tell important stories. I do love photography with all my heart thou :). If there is anything I can do to help you, I will. Analog photography is a truly great thing, we all need to help each other.
I have never printed or bleached on Fomabron 111 paper before, so not sure how it reacts to bleach.. I generally use Ilford fb papers, mostly the warm tone stuff. I find that every paper reacts very different to bleaching so you need to go slow and steady at first to figure out how yours responds.
I would suggest the following.
- use a very dilute mixture. I tend to mix by scoops form a small metal spoon and judge by color (not an exact thing, more of a "feel" of what is right). I tend to go more dilute at first and then slowly add bleach as needed. If you go too strong your going to ruin your print so better to do little by little.
- Not sure you have seen my 2 bleaching vids, here they are.
- I apply the bleach with various brushes and also with a more dilute mixture in a squirt bottle.
- I also apply fixer in a squirt bottle that seems to activate it. I just play around till it looks almost right (do not over do it)
- Be very careful how long the bleach is on the print, and also where it goes. Get good at controlling the bleach spread with the water hose.
- Watch out for splashing bleach that leaves marks on the prints you forgot to move out of the way. I have lost many prints with my carelessness.
- Try and not over bleach as that just looks too damn strange. Unless of course if that is what your going for.
In the future I plan on experimenting with doing the bleaching on a more flatter surface, for better control.
Not sure where your pink and yellowish dots are coming from (send me a photo). That sound pretty bizarre. My stuff just goes over white if I do too much bleaching, and is unnoticeable if I do not enough. Did you try bleaching on a different paper? What happened? Same problems? It does not sound like a pottasium ferricyanide problem, I would guess it has to do with the paper in some way or some kind of contamination. I usually do my bleaching as part of my secondary printing after the print has been washed in an open try during the fist printing stage. During secondary printing my final wash in an archival washer takes place after the bleaching, fixing, hypo clear, toning.